

Building a Page
Building a Page
Behind the scenes of how I create a page of The Atlantean.

I thought I’d do something a bit different this week. As I mentioned before, I’ve started to ramp up work on my new comic called The Atlantean so I thought it would be fun to show some behind the scenes of how I build a page. I’ve been using Adobe Fresco a lot lately and one of the big advantages is that you can go back and forth between Fresco and Photoshop fairly seamlessly. Before we jump in, here’s a look at the final inked page:

How did we get there? Let’s start at the beginning…
Step 1 - The basic page template.
I started out in Photoshop and created a template that I could use to start every page. The template uses guides to mark the areas for the full bleed, trim, and safe areas. If you’ve ever seen a piece of traditional hand drawn comic pages, they’re typically done on 11” x 17” bristol board that are marked with these spaces to represent an enlarged version of the comic. If you’re not familiar with the terms, Full Bleed refers to the area a bit beyond where the actual trim size (or final cut down size) of the page. This is done to make sure you’re covered if there’s any slight shift in the printing process. The safe area is the space set further in the page to make sure nothing important goes beyond that. Things like text and word bubbles or any important bits of the art. Here’s what my template looks like.

Step 2 - Panel layouts
Breaking down a page requires thinking about the script and action that will go on in this page and working out the best layout. This page is sort of a redraw of a page from the preview comic (if you’re a subscriber, you should have a digital version of this already) so I already had a good idea of the flow of the page. I wanted to give my panel borders a hand-drawn look in Fresco, so in Photoshop I created guides for the panels. Since I decided on a 3-panel grid at the top of the page and loose, open panels for the action, I wanted to mark of a rough area for the borderless panels:

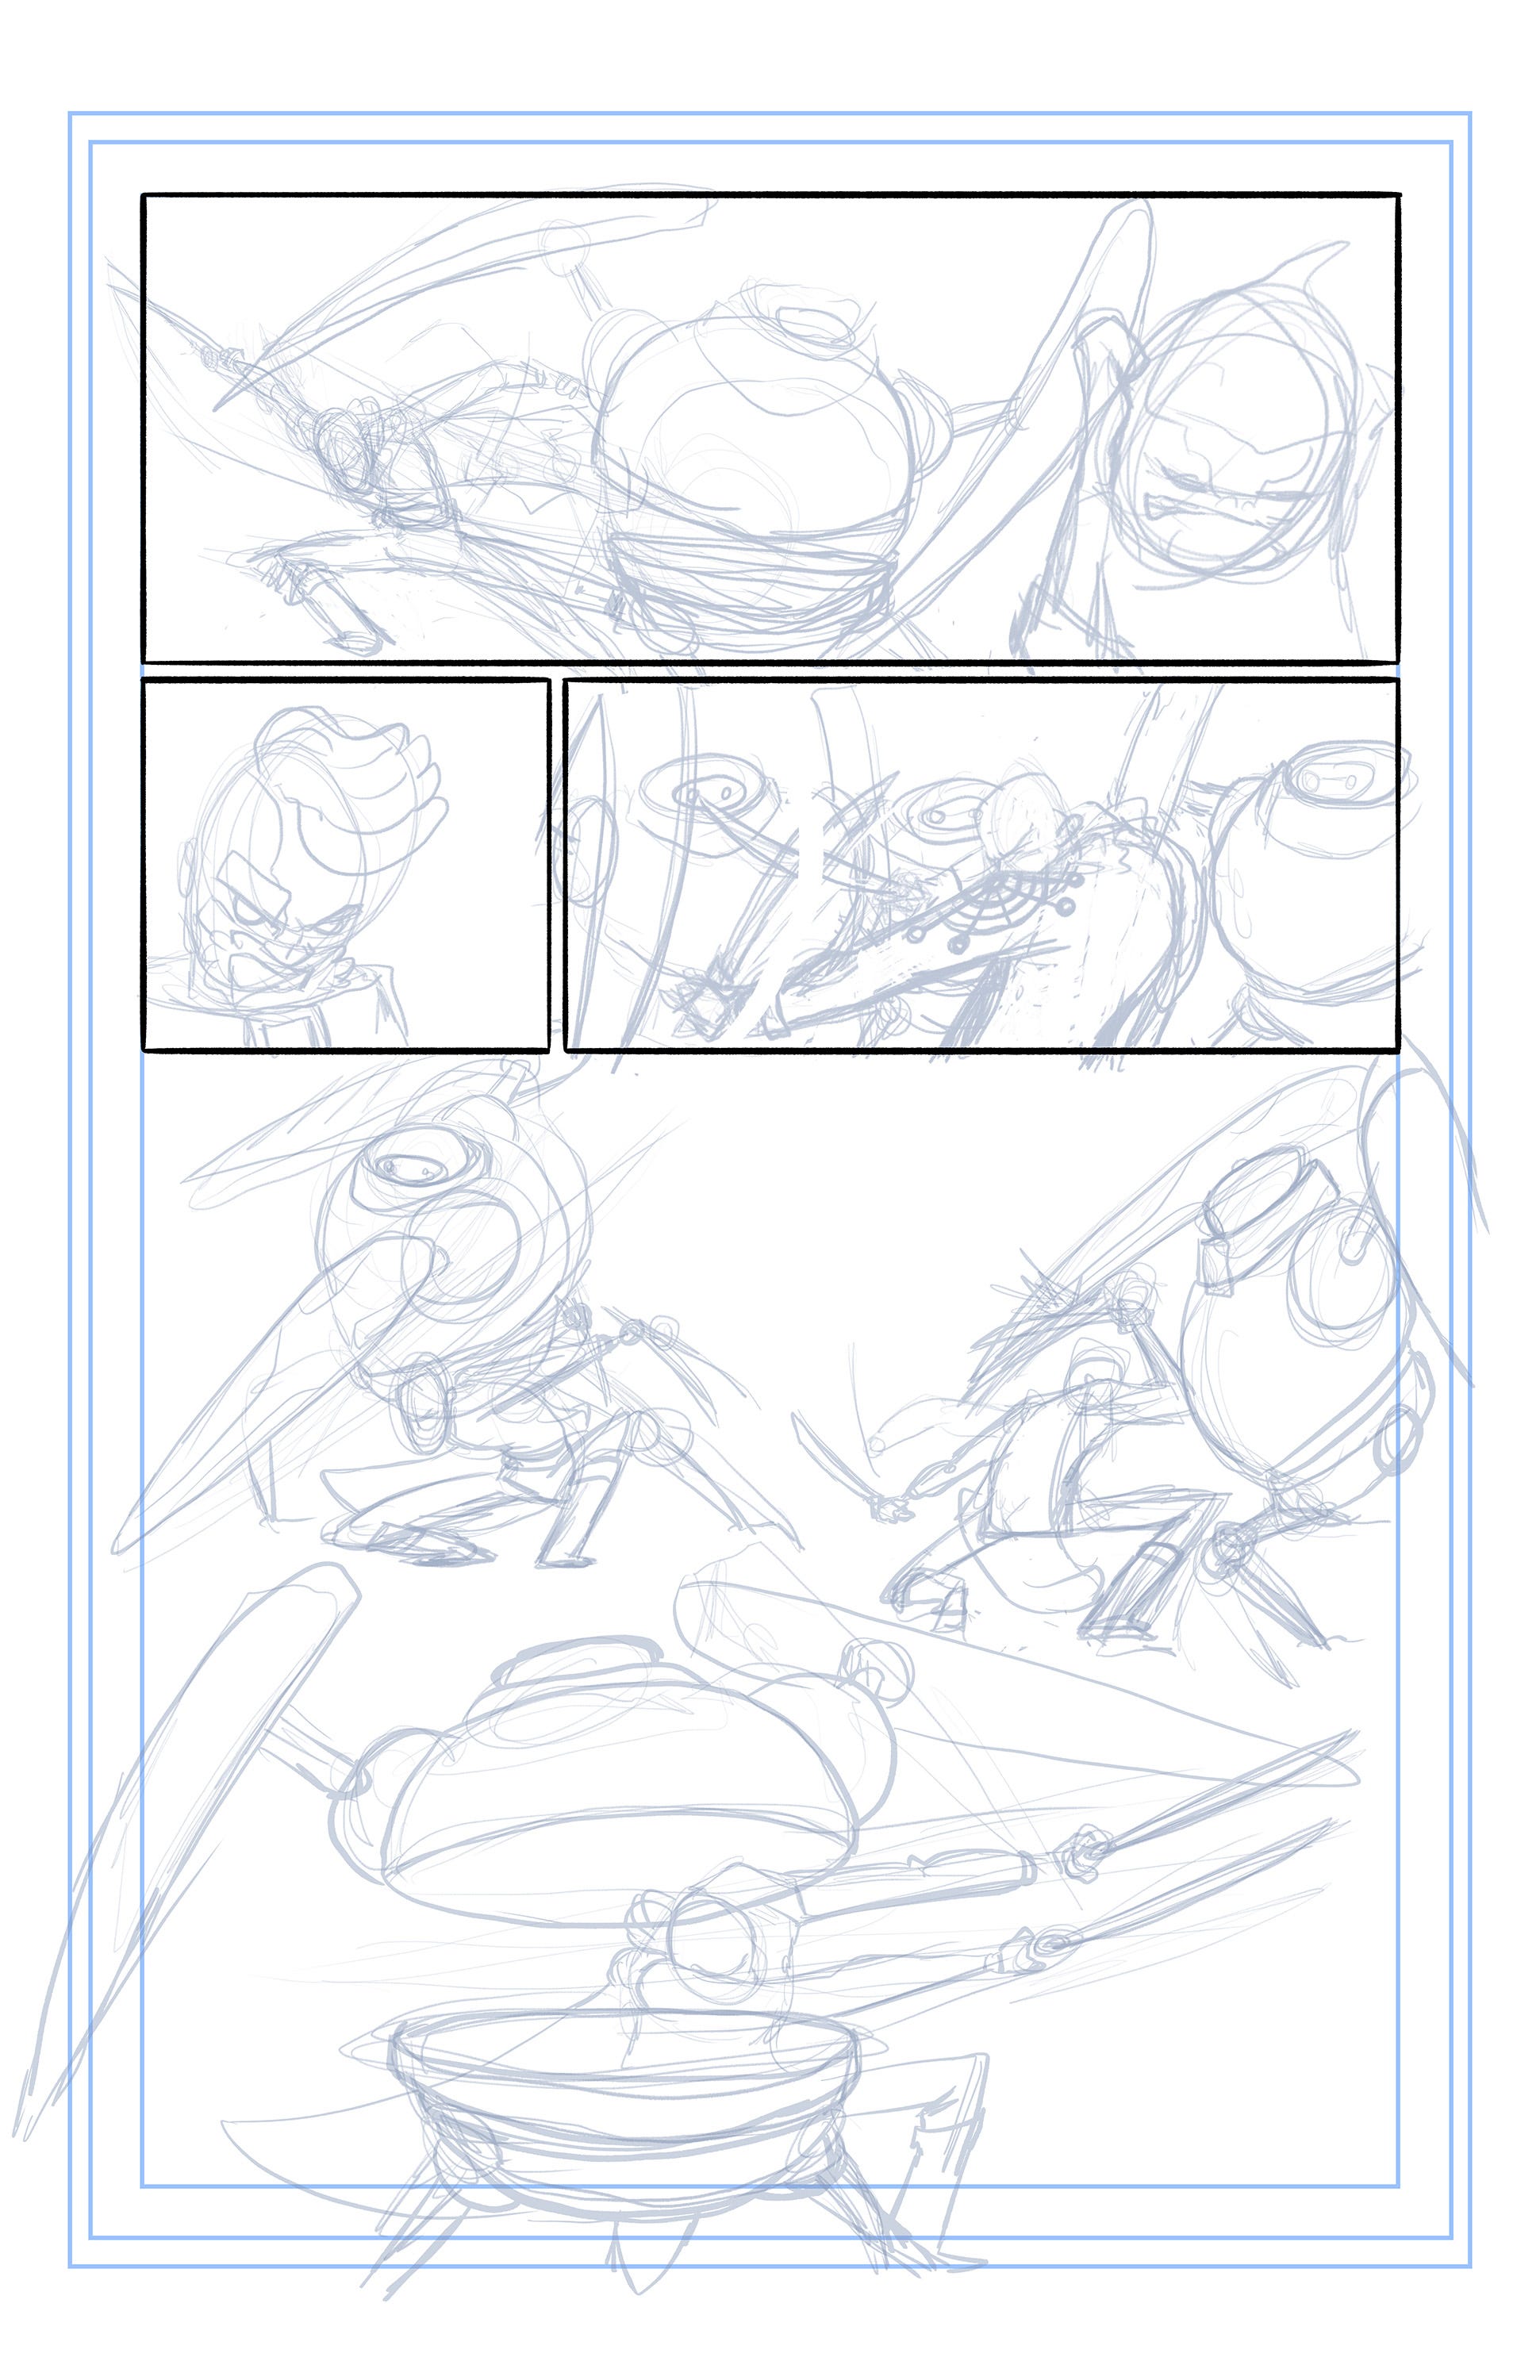
Step 4 - Rough Pencils
Wait a minute… what happened to Step 3? Well, step 3 is drawing out the panels using the ruler feature in Fresco. It’s not all that exciting, so we skipped that bit. On to pencils! This is where I work out the figures and most of the details, although in a quick and dirty way. Some artists, especially if they’re pencilling for an inker who is someone else, will make really awesome, detailed pencils. I know I’ll be changing a bunch of stuff in the inking process so I’m really just looking for forms and structures here…
Step 5 - Inking
This is my favorite part. I get to somewhat turn off my brain and just draw based on my rough pencils. Sometimes I won’t have enough detail and I’ll need to go back and work out some forms in pencils again, but for the most part I do all of the rendering in this step…

Wrap up
You may have noticed that this page isn’t technically “done”. Where is the dialog and sound effects? Where’s the color? Ok, you got me. Usually, I rough in the dialog and word bubbles before I sketch out the pencils to make sure I’m leaving enough space for them. For this page, though, there’s only one line of dialog in panel 2, so I figured I could wing it. As for colors, I’m working on new coloring techniques that aren’t quite ready for prime time yet, so those will have to wait a bit more. I only have a few more pages to draw in chapter 1, so the current plan is to finish the art and then color them all at once.
Anyway, I hope you enjoyed this peek behind the curtain and if anyone wants the photoshop file of the page template, let me know in the comments here.
As always, thanks for reading! If you want to see more of my artwork/sketches/ramblings, follow me on X and Instagram. And if you really want to support me, I have a store!
I also started an illustration studio, so if you or anyone you know is in need of custom illustration, check out Sketch Foundry!
Have a great week!
-Brad